
So you have some packages you made yourself, or that you've found with an appropriate license to adapt for yourself. In my case, I want developer productivity boosting tools but not so many that it gets overwhelming to work with them. I also don't want to just be thrown in with tools I'm unfamiliar with, so I don't want to use a template someone else has made. That means I'll be adapting one of my own packages.
Glancing around my packages, a few of the features I wanted are:
- Pre-commit hooks (
pre-commit)- Avoid leaving in debug statements, check it's
black/isort-linted, avoid trailing whitespace and that tests are named properly
- Avoid leaving in debug statements, check it's
- Documentation (
sphinx)- Generate docs from your docstrings and type annotations, in the Google code style
- Run tests on CI with
tox- Code tests, type checking, and docs builds, with the
tox-condaplugin, andminiconda
- Code tests, type checking, and docs builds, with the
The point of adding all of these parts at the start of your project isn't that it's logistically difficult to move or create the appropriate config files after repo creation, but that it takes time that can itself be a disincentive. But if left until after development begins, there can be significant friction when introducing them, for example type annotation is notorious for the difficulty of introducing it to an already mature project.
Choosing the right package
The process to turn a package into a parameterised template is simple enough, but step 1 is to choose between several similar packages I have.
My approach to select the right package was to run find
to search for repos you have with desired best practices,
e.g. for setuptools_scm git tag-based versioning I run:
find ./ -iname "version.py" 2> /dev/null
All of this shortlist had src/ layout, tests/, codecov.yml, mypy.ini, and tox.ini.
Then run ls on candidate package directories to spot major differences among your shortlist.
I then noted down the features they had and removed those with only a subset of the
ones I wanted. This whittled it down to 1 package, range-streams, which had badges in its README,
a data directory, a docs directory, a tools directory (housing a Miniconda installer for CI),
and pre-commit config.
Preparing a package to become a template
After selecting the package in the range-streams/ directory, I copied it as py-pkg-cc-template
and prepared it by clearing out build artifacts from its previous life.
cp -r range-streams/ py-pkg-cc-template
cd py-pkg-cc-template
rm -rf build/ dist/ data/* docs/_build src/*.egg-info
rm -rf .eggs/ .git/ .coverage* .mypy_cache .pytest_cache .tox/
mv src/range_streams src/{{cookiecutter.underscored}}
I also deleted:
- all the modules in the package except for
__init__.pyand thepy.typedfile, and all of the modules intests/ - all the
.rstfiles indocs/except forapi.rstandindex.rst - most of the text in the RST files in
docs/which would no longer apply
tree -a lists all the files (including hidden files) that remain as you complete this pruning process, which left me with:
.
├── codecov.yml
├── data
│   └── README.md
├── docs
│   ├── api.rst
│   ├── index.rst
│   ├── make.bat
│   ├── Makefile
│   ├── _static
│   │   └── css
│   │       └── style.css
│   └── _templates
├── .github
│   ├── CONTRIBUTING.md
│   └── workflows
│       └── master.yml
├── .gitignore
├── LICENSE
├── mypy.ini
├── .pre-commit-config.yaml
├── pyproject.toml
├── README.md
├── .readthedocs.yml
├── requirements.txt
├── setup.py
├── src
│   └── {{cookiecutter.underscored}}
│       ├── __init__.py
│       ├── log_utils.py
│       └── py.typed
├── tests
│   ├── core_test.py
│   └── __init__.py
├── tools
│   └── github
│       └── install_miniconda.sh
├── tox.ini
└── version.py

12 directories, 26 files
Note that in my package, the tests/ folder is at the top level, whereas in Simon's they're within the
package. This is one of many little reasons I wanted to convert one of my own packages rather than
use someone else's and then adapt it to my way of packaging Python libraries.
Parameterised naming conventions
The remaining package is minimal but still contains many references to its old name.
The approach taken by Simon's template is shown in the cookiecutter.json file:
- The library name is lowercased, split on whitespace, and this list is joined with hyphens, then any underscores are swapped for hyphens as the "hyphenated" format
- The "hyphenated" format has hyphens substituted for underscores as the "underscored" format
{
  "lib_name": "",
  "description": "",
  "hyphenated": "{{ '-'.join(cookiecutter['lib_name'].lower().split()).replace('_', '-') }}",
  "underscored": "{{ cookiecutter.hyphenated.replace('-', '_') }}",
  "github_username": "",
  "author_name": ""
}
We can break down the config by each part's usage:
lib_nameis the 'human readable input', and never used as a valuehyphenatedis used as:- the package
nameinsetuptools.setup()(thus is also used in the PyPI URL in the README and as the pip-installable name), - the top-level package directory name (i.e. the repository name and thus its URL), so is used in GitHub URLs in the README and setup script.
- the package
- the underscored form is used as:
- the import name,
- ...thus is used in an example test function (a function is provided in the package's
__init__.py) setup.pyunderpackages(or not if you're going to usefind_packages)
This same format must be applied to your own minimal package to convert it into a Cookiecutter template.
The templating tags here are from the jinja2 package, and the Cookiecutter site has a
guide
if the format is new to you.
Note that for whatever reason, when the value is to be used as a filename then it's not wrapped with a space inside the curly brackets, but when used inside a file spaces are put either side.
For example in Simon's python-lib Cookiecutter template, the file with the test in is named:
{{cookiecutter.hyphenated}}/tests/test_{{cookiecutter.underscored}}.py
and its first line is
from {{ cookiecutter.underscored }} import example_function
Not to forget the other Cookiecutter variables:
- The description variable is used in the
setuptools.setup()call as thedescriptionargument, and is placed in the README after the header and badges. - The
github_usernamevariable is optional, and if provided will be used for:- the
urlandproject_urlsarguments tosetuptools.setup(), - a GitHub changelog badge and a (hardcoded) LICENSE badge in the README
- the
- The
author_namevariable is optional, and if provided (full name) will be used for theauthorargument tosetuptools.setup().
Converting a minimal package into a templated one
The most important step here is to put the Python package in a subdirectory now,
and to name this {{cookiecutter.hyphenated}}.
All that should be in the root directory is:
.git/directory{{cookiecutter.hyphenated}}directorycookiecutter.jsonfile
If your old package name was already hyphenated (like mine, range-streams), then you can easily
replace all of the underscored names to {{ cookiecutter.underscored }} with a recursive in-place find/replace.
However some of the hyphenated names could well be proper names in docs. Despite this, it's still
probably easier/quicker to just review the hyphenated ones and change them to lib_name rather than
review every instance. I only had 1 instance of "Range streams", in my docs/api.rst header.
find . -type f -exec sed -i 's/range_streams/{{ cookiecutter.underscored }}/g' {} +
find . -type f -exec sed -i 's/range-streams/{{ cookiecutter.hyphenated }}/g' {} +
This was fine for me, because I never used the name
Range Streamsas a proper name anywhere, but many libraries do, e.g. compare PyTorch vs. pytest.
If you're starting from a package with a single word name you can't distinguish the two, and would just have to do this part manually...
Next, run a grep -r on your GitHub username and if it looks correct then:
find . -type f -exec sed -i 's/lmmx/{{ cookiecutter.github_username }}/g' {} +
Then, do the same for your name
find . -type f -exec sed -i 's/Louis Maddox/{{ cookiecutter.author_name }}/g' {} +
and the package description
find . -type f -exec sed -i 's/Your description goes here/{{ cookiecutter.description }}/g' {} +
You may want to go further and parametrise:
{
  "email": "",
  "year": ""
}
and use these variables in the setup script and LICENSE file.
Troubleshooting templating tags
I found that cookiecutter tried to fill in templating tags in my GitHub Actions workflow
such as {{ matrix.python-version }}, and to prevent this I had to fill it in as:
{{ "{{ matrix.python-version }}" }}
so the line
name: "Python ${{ matrix.python-version }}"
became
name: "Python ${{ " {{ matrix.python-version }}" }}"
Upgrading your converted template
After you've turned your package into a template, you may wish to review the examples from the previous section and introduce some of the tools used there. It's particularly easy to do so from a template package, as the library state and 'packaging' around it is so cleanly separated.
For example, I want to use the flake8 package (which I regularly use in development locally)
on CI. Unfortunately, though the Hypermodern Python template declares uses this tool,
it installs it via Poetry, which I'm not using.
The command I use locally is flake8 "$@" --max-line-length=88 --extend-ignore=E203,E501,
which would become a tox.ini block:
[flake8]
ignore = E203,E501
max-line-length = 88
but actually flake8 amounts to linting so would be executed in the lint job so would be run by
pre-commit in .pre-commit-config.yaml as:
  - repo: https://gitlab.com/pycqa/flake8
    rev: 4.0.1
    hooks:
      - id: flake8
        args: ["--max-line-length=88", "--extend-ignore=E203,E501"]
Upgrading your tools is complicated in this way as they are not necessarily 'one size fits all', but psychologically it feels more worthwhile in the knowledge that any slowdown here will give you a speedup in the long run, and you won't have to repeat this effort for future packages.
Using your package template repo
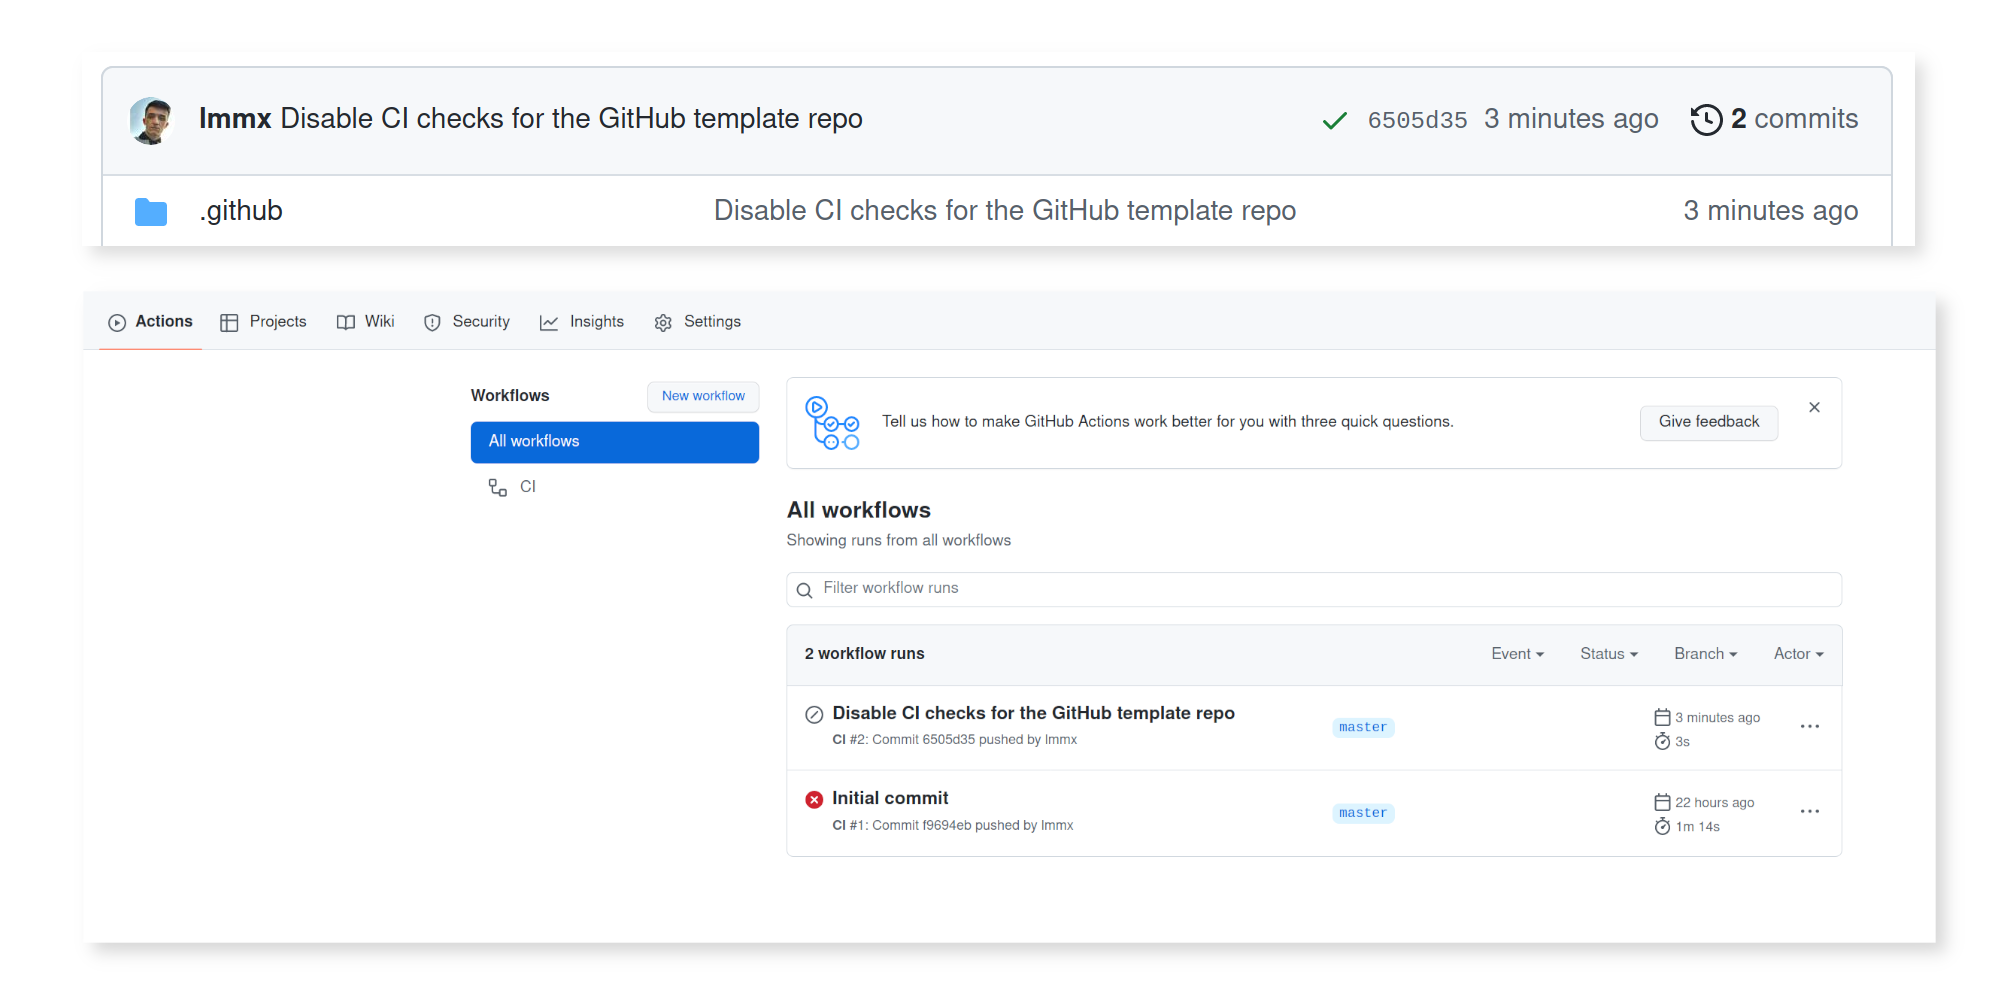
If you upload the template repo as is, all the CI workflows will run and fail, of course, because it is parameterised by cookiecutter variable names.
To prevent this, an approach used elsewhere by Simon is to include a check for whether the GitHub repo name is the name of the template repo:
jobs:
  setup-repo:
    if: ${{ github.repository != 'simonw/python-lib-template-repository' }}
In this case, Simon is using it to auto-cut the cookiecutter template when the template repo is used, in a 'self-deleting' setup script, however here I'm just focusing on not having the GitHub template repo's CI run. In the next section I will discuss the tricks his approach uses.
We can use this same approach as a simple way to skip the CI job(s), and therefore not run tests or any other task that will fail on an invalid Cookiecutter template package.
With this single change, we can now 'cut' a new Python package from the template, since Cookiecutter works directly with git repos. Here, I want to create a new package called importopoi:
pip install cookiecutter
cookiecutter gh:lmmx/py-pkg-cc-template --no-input \
  lib_name="importopoi" \
  description="Visualising module connections within a Python package" \
  github_username="lmmx" \
  author_name="Louis Maddox" \
  email="...@..." \
  year="2022"
Calling this creates a directory called importopoi/ which just needs a git init to be set up
with working tests as your new package with pre-commit hooks and tests passing on GitHub Actions CI.
-
On my first attempt the package tests didn't succeed, specifically the coverage. At first I thought this was due to bugs in the library itself that prevented pytest from finishing, meaning the coverage report wasn't available for the step that combined and uploaded it to the coverage server. I was able to get the entire tox workflow to run locally, but still couldn't get the coverage XML to be detected.
-
After this, I had to upgrade the version of
blackused in thepre-commitlinting step, since the older version no longer worked due to aclickpatching error. This was annoying but led me to look up a bunch of other pre-commit configs in major repos via grep.app, which I then pilfered some more handy hooks from to improve my setup. -
I also found that Sphinx did not successfully build the docs from the template due to formatting issues, which I then scripted away (since the cookiecutter templating tags are just jinja, to get correct headers in RST I needed to loop over the templated variables in a
{{ "{% for %}" }}loop). Once confirmed working in a minimal reproducible example I edited the Cookiecutter template repo to match. -
Once I got the code coverage report generation to succeed, I also had to pass in a token to 'register' the repo with codecov (which I forgot I had to do, as I hadn't set one up recently). My other projects registered with codecov didn't set it in the GitHub website's secrets, and 10 minutes later I found the repo had been 'registered' (at app.codecov.io/gh/lmmx/importopoi). Despite passing the
--omitflag to the coverage report command, I still got stats for the entire repo, whereas locally I got stats for just the files I wanted to include. I settled to just lower the 'target' value from 100% to 30% so my CI doesn't show as failed. The web report is still useful enough to keep.
...and finally my CI checks all passed!
The final thing to remember to do was to go to ReadTheDocs and actually create a project for the repo (as otherwise clicking the link in the README gave a 404). All it took to get that link working was to refresh the list of projects, click the + button and then the rest set itself up automatically from the git repo.
The separation of the library code and the 'portable' packaging infrastructure means I can move lessons learnt into the 'portable' infra while experimenting with what works in a particular package.
It's also a lot quicker to learn those lessons when you have a minimal repo, as the entire CI workflow runs faster so you can iterate faster.
Repackaging your old packages
I wanted to revisit an old package of mine recently, mvdef, but was immediately frustrated that it
didn't conform to the more rigorous style of packaging (easy pre-commit linting and tests under the tox
command, with known up-to-date configs, code coverage, all that good stuff).
With my package template set up, all it took was
cookiecutter gh:lmmx/py-pkg-cc-template
and after re-entering the details for mvdef I had a fresh package set up and ready to use.
I then copied the old package src/mvdef directory back under src/mvdef/legacy in the fresh one,
and simply edited the entrypoints to point to src/mvdef/legacy/... rather than src/mvdef/...
and everything worked as expected. This was simplified by the widespread use of relative module
access in this package (so .utils rather than the full qualname mvdef.utils),
which meant that shifting everything down a directory level didn't break references in imports.
It can be easier to start from a blank page sometimes, but a ready-made package is even better than a blank page (perhaps a better analogy is using lined paper vs. drawing/printing out your own on plain A4).
Once I'd verified it worked in a locally editable pip installation, I copied over the .git repo
information from the original mvdef package which then alongside git tag allowed setuptools_scm
to let me republish the correctly bumped version of the package, preserving the full repo history.
This post is the 2nd of Package templating, a series covering how to generate a skeleton for a Python package with minimal barrier to setup with best practices like linting, pre-commit hooks and tests on CI. Read on for discussion of Generating Cookiecutter templates from a GitHub template repo